In this post I will review, how to turn on or off LEDs using Raspberry Pi 2, Model B (RPi).
First we copy Raspbian linux to a microSD card, turn on RPi and connect to it using ssh.
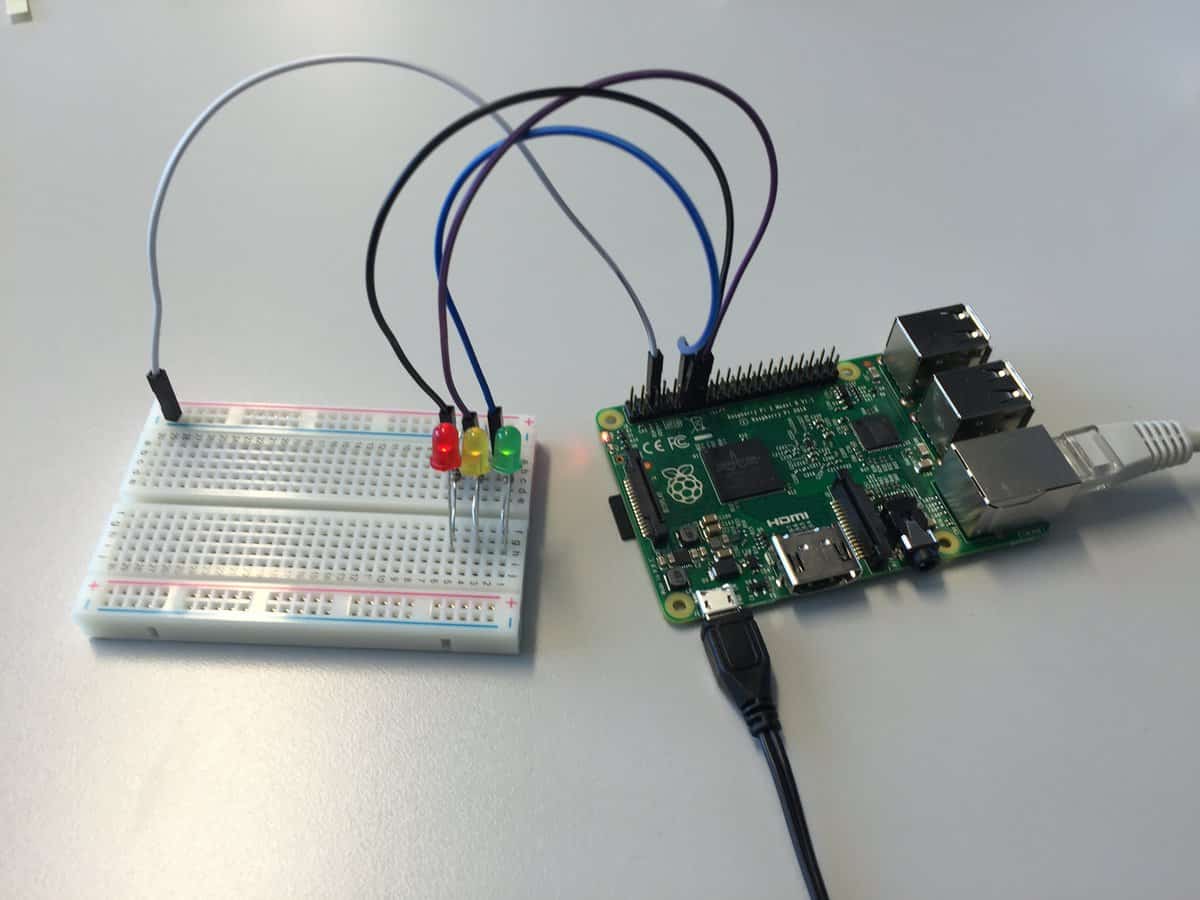
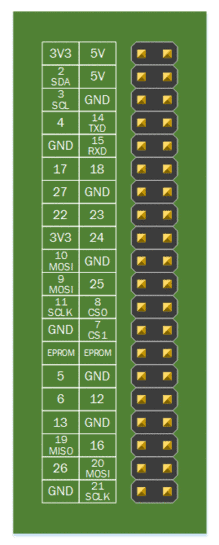
We use three LEDs and each needs to be connected to each own positive supply of the circuit and ground, as well as, we needed laser cutting to get the perfect size. For the positive supply on RPi we use pins 18, 17 and 27 as seen on the scheme below:
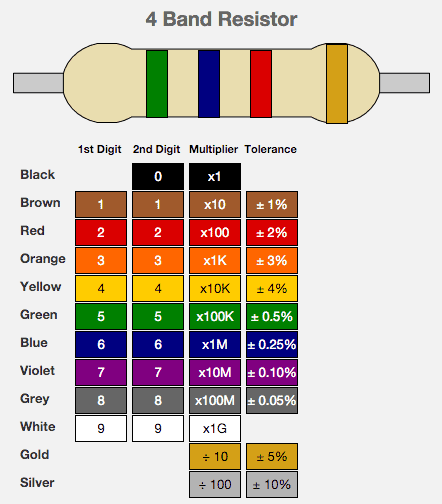
As the current would be too high if we connect the LED directly into the circuit, we need to add a resistor for each LED. As it is written in the Raspberry Pi spec, it can safely allow up to 16mA current. Our pins can supply 3.3V. Therefore to allow the LED to be the brightest, we can use 210Ohm or stronger resistor. Using stronger resistor will result in the LED not being so bright.
In this example I am using 560Ohm resistor. I am also attaching a nice scheme for calculating the resistance of 4-band resistors:
To control a specific LED, we can “turn on” a specific LED using a Python library. First we need to set a pin as output and then we can turn it on (GPIO.HIGH) or off (GPIO.LOW). An example of a script that turns on a LED:
[codesyntax lang=”python”]
import RPi.GPIO as GPIO
import time
GPIO.setmode(GPIO.BCM)
GPIO.setwarnings(False)

GPIO.setup(18,GPIO.OUT)
GPIO.output(18,GPIO.HIGH)
[/codesyntax]
Physical result: