We are continuing with the example from the first part of the tutorial: https://blog.zitnik.si/2016/02/04/part-13-controlling-leds-using-raspberry-pi/.
In this part we are going to install OpenHAB platform on an RPi and remotely control LEDs.
OpenHAB (http://www.openhab.org/) is a software that is intended to connect to many sensors or devices for home automation. It works as a smart devices gateway and includes tools to design a custom GUI to control these connected smart devices. A GUI can be accessed using a web browser or from a nice mobile application (iOS, Android).
OpenHab Installation
We first installed OpenHAB core and then Demo from the official site: http://www.openhab.org/getting-started/downloads.html. These are compressed packages which I unzip into /opt/openhab folder. Within the new directory, there’ll be a folder called configurations. Within this folder create a copy of the default configuration file openhab_default.cfg and name it openhab.cfg. This is where you’ll store all your settings for openHAB and any bindings you need.
To start the OpenHAB server, run /opt/openhab/start.sh.
OpenHAB configuration
To control our LEDs we will need to create three files.
Create a file configurations/items/default.items. This will be an inventory for definition of our sensors. The file should look like:
[codesyntax lang=”text”]
Switch RedLight				"Rdeca luc"
Switch GreenLight			"Zelena luc"
Switch YellowLight			"Rumena luc"
[/codesyntax]
The next file should define the rules and actions for these sensors. So, create a file named configurations/rules/default.rules to look like:
[codesyntax lang=”text”]
import org.openhab.core.library.types.*
import org.openhab.core.persistence.*
import org.openhab.model.script.actions.*
import org.openhab.action.pushover.*
import org.openhab.action.pushover.internal.*

rule "RedLight changed"
when
 Item RedLight received command ON
then
 logInfo("RedLight", "Received red light command to turn on.")
 executeCommandLine("python /home/pi/red_on.py")
 pushover("Rdeca luc je bila prizgana.")
end

rule "RedLight changed"
when
 Item RedLight received command OFF
then
 logInfo("RedLight", "Received red light command to turn on.")
 executeCommandLine("python /home/pi/red_off.py")
end
[/codesyntax]
As you can see I also configured the pushover service so that I am notified about the change via a push notification. It can also be observed that on some command received, a log message is created and a command line script is executed. These scripts look the same as in the first part of the tutorial, where we introduced how to turn LED on or off.
In the last file, named configuration/sitemaps/default.sitemap we will define the GUI for our application. Our file looks like this:
[codesyntax lang=”text”]
sitemap demo label="Raspberry demo"
{
 Frame label="Luci" {
   Switch item=GreenLight label="Zelena luc"
   Switch item=YellowLight label="Rumena luc"
   Switch item=RedLight label="Rdeca luc"
 }
 Frame label="Videokamere" {
   Text label="Raspberry kamera" icon="video" {
     Frame label="Raspberry kamera" {
       Video url="http://localhost:8081?action=stream" encoding="mjpeg"
     }
   }
   Text label="Raspberry kamera" icon="garden" {
     Frame label="Raspberry kamera (snapshot)" {
       Image url="http://localhost:8081?action=snapshot" refresh=5000
     }
   }
 }
}
[/codesyntax]
For now you can skip the “Videokamere” part as it defines video stream and snapshot images of a camera that we will attach to the raspberry (below).
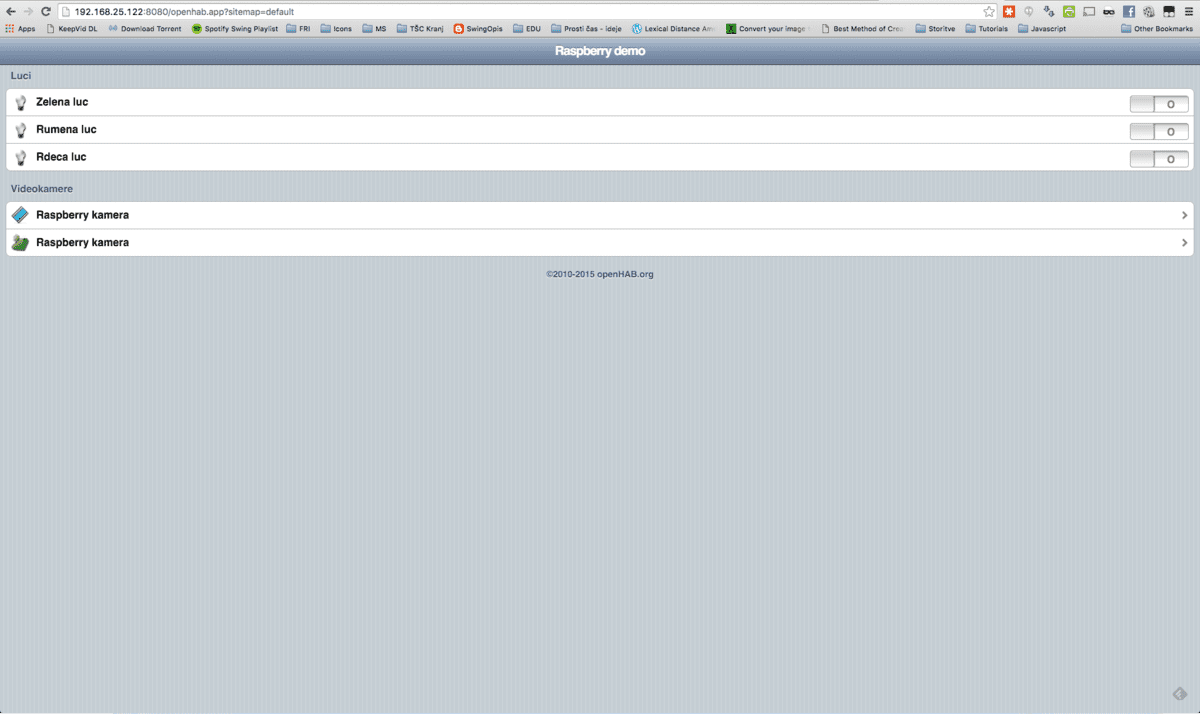
As you save the file and run the server, the GUI can be accessed via a web browser using URL http://RPi_IP:8080:
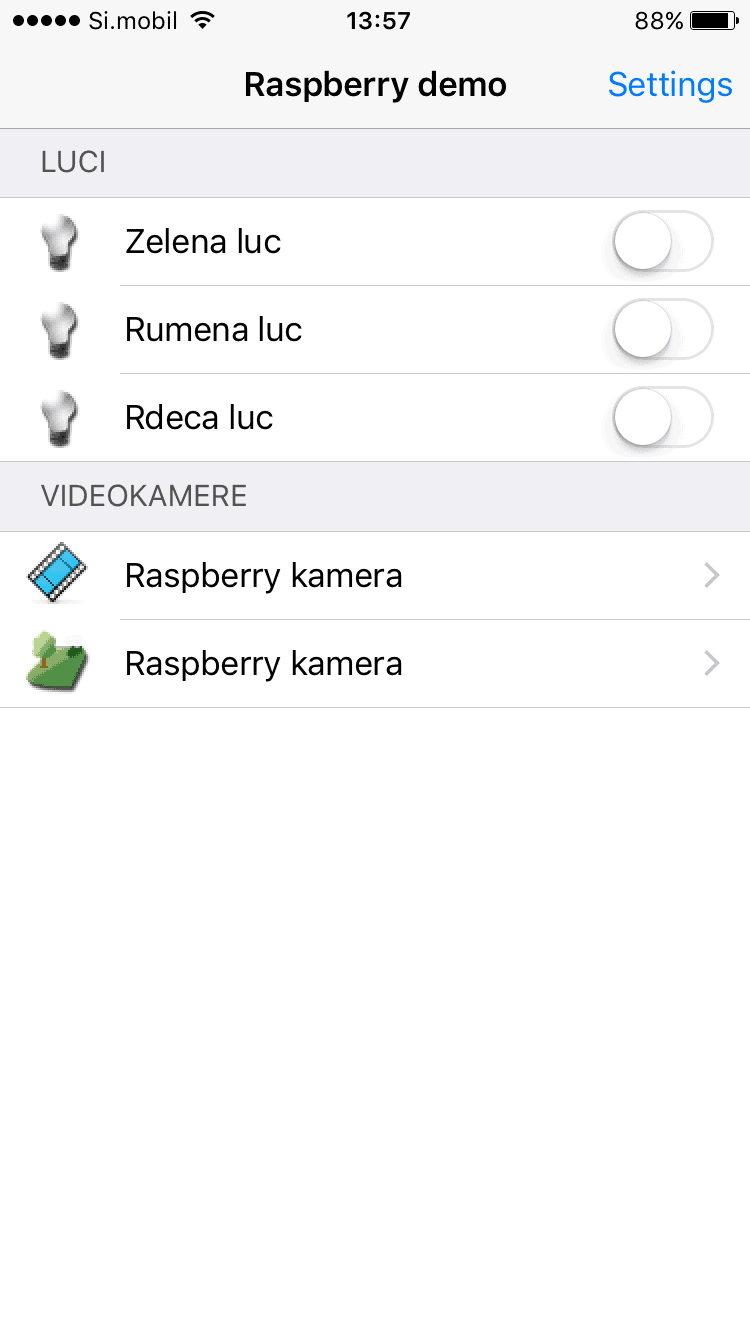
You can also use this URL in a mobile application and have a native interface – e.g. on your iPhone, which looks like this (for our sitemap definition):
You should now be able to turn on or off your LEDs using OpenHAB platform. Try it out!
OpenHAB and Raspberry Pi Camera Module
Now we would also like to check our lights remotely via a camera. We will use mjpeg stream for video streaming.
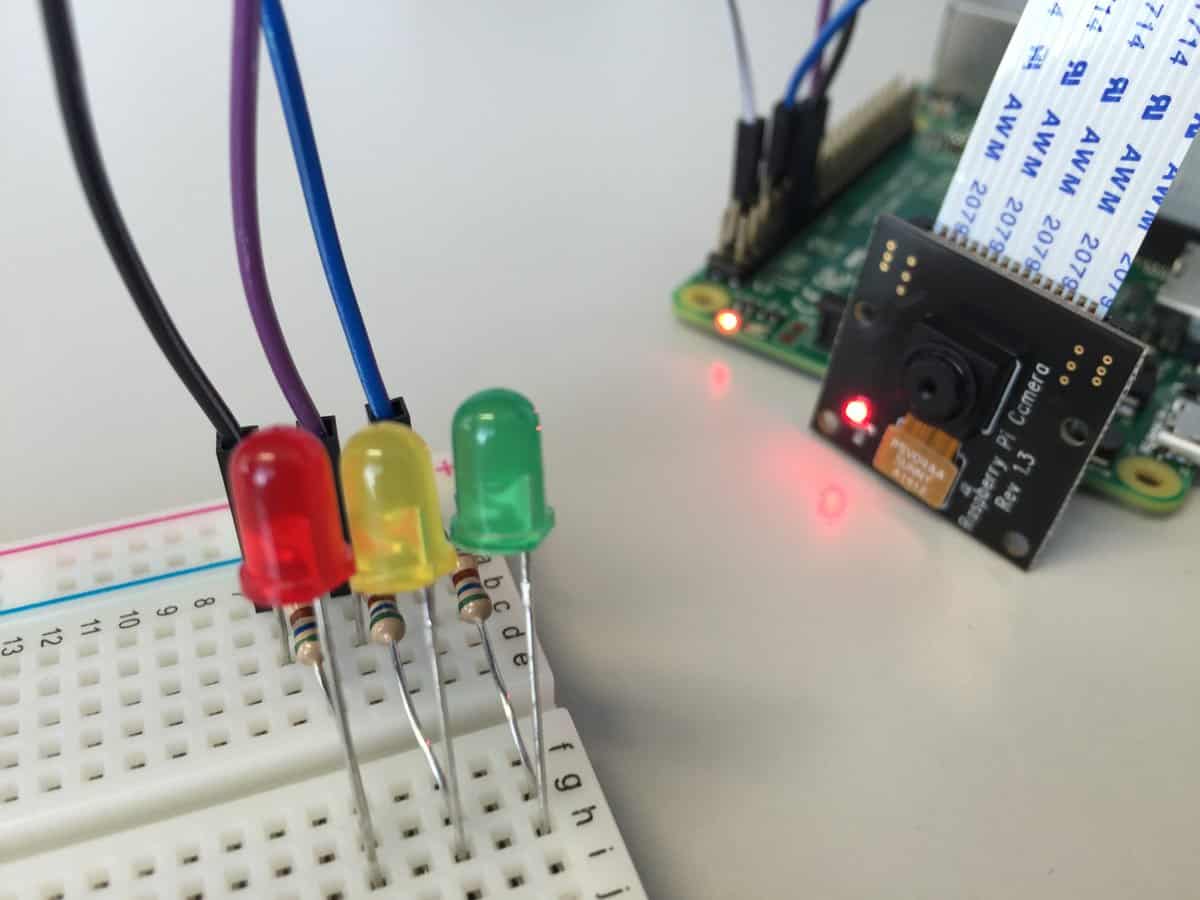
We have an RPi Camera Module, which we attached to the RPi. After that we run “sudo raspi-config” command and enable the camera module.
First we need to install some dependencies:
[codesyntax lang=”bash”]
sudo apt-get install libjpeg8-dev
sudo apt-get install imagemagick
sudo apt-get install libjpeg62-dev
sudo apt-get install cmake
sudo apt-get install libv4l-dev
#create a symbolic link
sudo ln -s /usr/include/libv4l1-videodev.h /usr/include/linux/videodev.h
[/codesyntax]
Then we download mjpeg repository and build the library:
[codesyntax lang=”bash”]
# You can also choose to download some stable version instead of current master
git clone https://github.com/jacksonliam/mjpg-streamer.git .
sudo make clean all
[/codesyntax]
Now copy the directory of build files to /opt/mjpg-streamer and run mjpeg streamer using the following command (I am using parameter vf to vertically flip the image):
[codesyntax lang=”bash”]
LD_LIBRARY_PATH=/opt/mjpg-streamer /opt/mjpg-streamer/mjpg_streamer -i "input_raspicam.so -fps 5 -q 50 -x 640 -y 480 -vf" -o "output_http.so -w /opt/mjpg-streamer/www -p 8081" &
[/codesyntax]
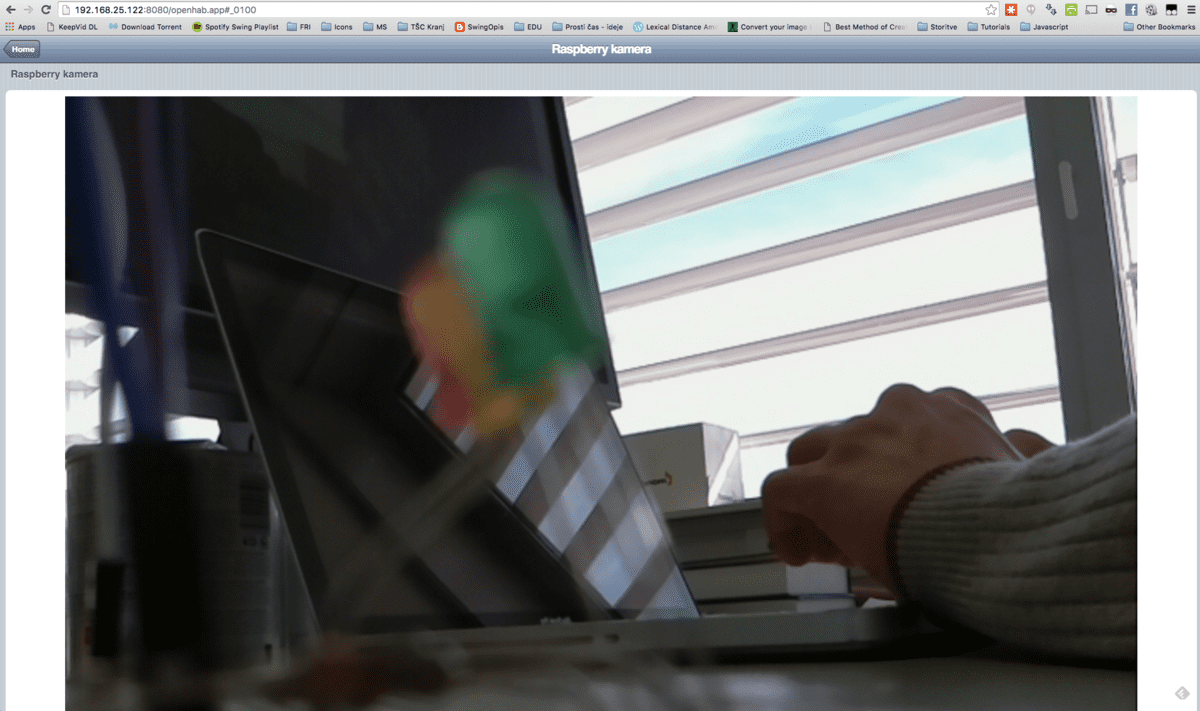
If everything is okay, a video stream should be accessible at http://RPi_IP:8081:

Also if OpenHAB is configured as above, videostream should be accesible over its GUI: